Unlock the myriad benefits of nurturing microgreens right from your living space
Microgreens have steadily grown in popularity due to their high nutritional content, versatility in cooking, and the relative ease with which they can be cultivated at home. Whether you have an expansive garden or a compact windowsill, you can enjoy the gratification of growing and consuming your own microgreens.
This detailed guide will steer you through each step of growing microgreens, the ideal DIY project for aspiring gardeners or seasoned green thumbs looking to add a flavorful twist to their meals.
Why Choose Microgreens?
Microgreens are the early seedlings of vegetables and herbs, harvested when they are only about an inch or two tall. Their size belies their rich, concentrated flavors and potent nutritional profiles, making them perfect additions to salads, sandwiches, and a wide variety of dishes.
Cultivating your own microgreens is not just an enjoyable and educational process, but it also allows you to enjoy fresh produce right from your garden to your plate. No longer will you need to settle for store-bought greens that may wilt or spoil quickly.
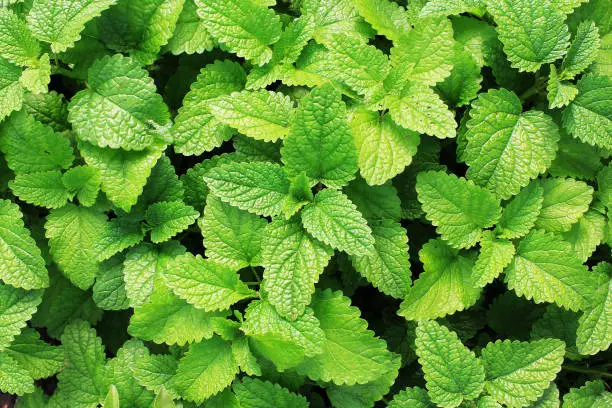
Choosing Your Microgreen Varieties
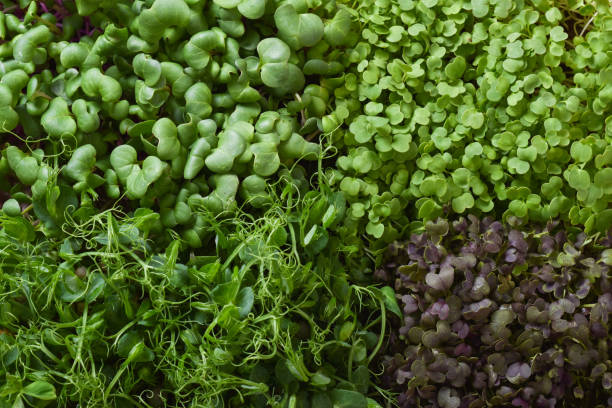
You have a world of choice when it comes to deciding which microgreens to grow. Virtually all salad greens and herbs can be nurtured as microgreens.
Starting with a pre-packaged seed mix specifically designed for microgreens can simplify the process for beginners. Here are a few popular varieties to consider:
- Mustard
- Kale
- Arugula
- Endive
- Beet greens
- Spinach
- Tatsoi
- Radish greens
- Watercress
- Mizuna
- Peas
- Cabbage
- Basil
- Lettuce
Remember to start small. Pick one or two types of seeds for your first batch. As you get accustomed to the process, you can start exploring with a broader array of microgreens.
Preparing for Planting
Once you’ve chosen your seeds, you’ll need to gather the following tools and materials:
- Planting tray or small pots, or a garden bed
- Small trowel or garden rake
- Sharp knife or scissors
- Seeds
- Growing medium (potting soil/peat moss/seed starting mix)
For the growing medium, an even mixture of potting soil and peat moss works well, as it helps retain moisture. Alternatively, a seed starting mix could also serve the purpose.
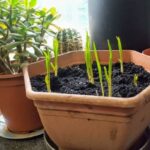
Planting Your Microgreens
The journey of growing microgreens starts with proper planting. This process, while simple, requires attention to details to ensure a successful growth and a bountiful harvest. In this guide, we will explore the step-by-step process of planting microgreens, whether in your home garden or in containers.
Preparing for Planting
Before you begin planting your microgreens, you’ll need to decide on the variety you wish to grow. Microgreens can be any green vegetable or herb that is harvested when the plant is still young, typically after the cotyledon leaves have developed. Popular choices include mustard, radish, spinach, arugula, basil, and kale, to name a few.
Next, gather your materials. You’ll need:
- A shallow container or tray, at least 2 inches deep
- High-quality potting soil or a seed-starting mix
- Your chosen microgreen seeds
- A spray bottle for watering
Planting Process
Step 1: Prepare the Container
Fill your container with your chosen potting mix, leaving about a half-inch space from the top. Smooth out the soil with your hand or a flat object to create an even surface.
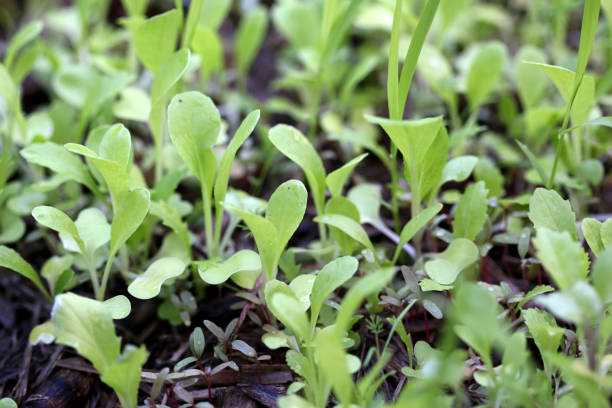
Step 2: Sow the Seeds
Take your chosen seeds and sprinkle them evenly across the surface of the soil. For denser microgreens, use more seeds; for sparser microgreens, use fewer. The seeds should be close together but not piled on top of each other.
Step 3: Cover the Seeds
After sowing, cover the seeds with a thin layer of soil. This can be about 1/8 of an inch thick. You want the seeds covered but still able to access light, which is vital for their growth.
Step 4: Water Gently
Using a spray bottle, gently mist the surface of the soil until it’s thoroughly damp but not waterlogged. This gentle approach is key, as a harsh water flow can displace the seeds.
Step 5: Create a Humid Environment
Creating a humid environment can facilitate germination. To do this, you can place a lid or a plastic wrap over the tray. Just remember to remove it once the seeds start to germinate, which typically happens within three to seven days.
Step 6: Find the Right Spot
Finally, place your container in a location where it will receive plenty of indirect sunlight. A south-facing window is usually a good option. However, if natural light is limited, a fluorescent or LED light can work well, too.
By following these steps, you’ll create the perfect environment for your microgreens to thrive. In about 10 to 14 days, you should be ready to start harvesting your own fresh and nutritious microgreens, right from the comfort of your home.
Caring for Your Microgreens
Cultivating microgreens at home has become a popular trend due to their high nutrient content and the ease with which they can be grown indoors. However, just like any other plant, microgreens require careful attention and maintenance to ensure healthy growth. Here’s a comprehensive guide on how to care for your microgreens, ensuring they thrive and provide a continuous supply of fresh, nutritious greens.
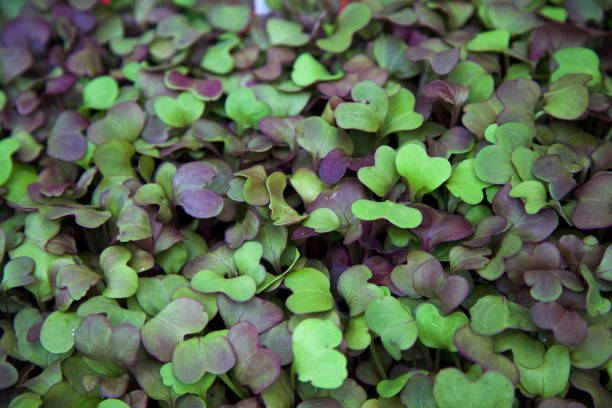
Choosing the Right Microgreens
When starting, it’s crucial to choose the right microgreens for your home environment. There are countless varieties, each with unique growing requirements and flavors. Some popular options include radish, broccoli, beet greens, peas, basil, and lettuce. Take into account your taste preferences, growing conditions, and the care each type needs. For beginners, radish or broccoli microgreens are excellent choices as they are easy to care for and grow quickly.
The Importance of Proper Lighting
Microgreens, like most plants, require adequate light for photosynthesis. Although they can survive with less light, they thrive under brighter conditions. If you’re growing your microgreens indoors, place them near a south-facing window that receives plenty of sunlight. Alternatively, if natural light is insufficient, you can use fluorescent or LED grow lights. Provide at least four hours of light exposure daily, but remember that more light often results in better growth.
Maintaining Ideal Moisture Levels
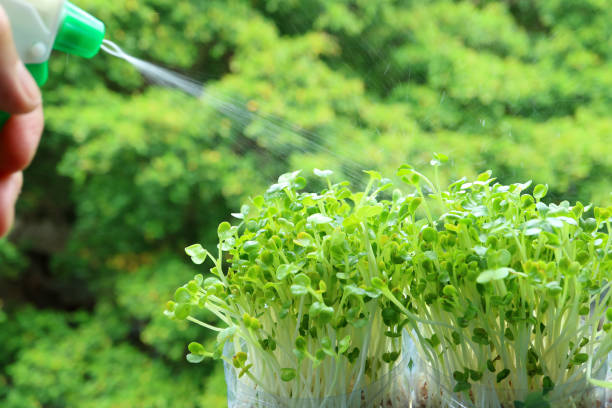
One of the most vital aspects of caring for microgreens is ensuring they have the right amount of water. Overwatering can lead to damping-off disease, a condition that can cause your microgreens to wilt and die. On the other hand, under-watering can hinder their growth. To strike a balance, mist your microgreens daily, keeping the soil moist but not saturated. The use of a spray bottle or mister ensures an even distribution of water.
Ensuring Proper Nutrition
Microgreens are harvested early, which means they don’t require as much nutrition as their fully-grown counterparts. However, the quality of the soil they are grown in can significantly impact their health and growth. A nutrient-rich potting soil mix or a specific microgreens mix is recommended. If you’re growing your microgreens in containers, consider adding a slow-release granular fertilizer to the mix.
Dealing with Pests
Due to their short growing period, microgreens rarely suffer from pests and diseases. However, proper care and attention are required to prevent these issues. Always check your microgreens for signs of pests or diseases. If you’re growing brassicas (like broccoli or kale), and you’ve had issues with cabbage worms, a floating row cover can be an effective solution.
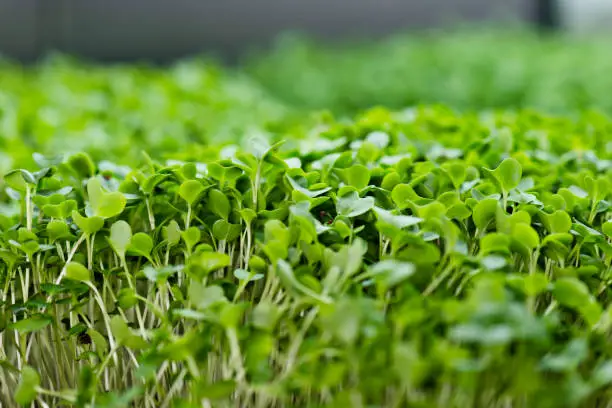
Harvesting Your Microgreens
Harvesting your microgreens is the final and most satisfying step of your indoor gardening journey. These little greens pack a punch of flavor and nutrients, perfect for garnishing your meals or adding to your salads, sandwiches, and stir-fries. The key to ensuring that you get the most from your microgreens is to know when and how to harvest them correctly. This guide will walk you through the process in detail.
Recognizing the Right Time to Harvest
Unlike mature plants, microgreens are ready for harvesting quite early in their growth cycle, usually just after the cotyledon stage, when the first set of true leaves begins to form. This is generally about 10-14 days after planting, depending on the variety of the microgreen. At this stage, the plants are usually about 1-3 inches tall.
Determining the right time to harvest is crucial. If you harvest too early, the plants may not have developed their full flavor profile and nutrient content. On the other hand, if you wait too long, the plants can overgrow, and the leaves may start to lose their tenderness and sweet, concentrated flavor.
Preparing to Harvest
Before you start the harvesting process, you’ll need a sharp pair of kitchen scissors or a clean knife. It’s essential that whatever tool you use is sharp to ensure a clean cut and to avoid damaging the plant.
You should also have a container ready to place your harvested microgreens in. A clean, dry bowl or tray works well for this.
The Harvesting Process
To harvest your microgreens, hold a clump gently with one hand. With your other hand, use your scissors or knife to cut the microgreens just above the soil line. Try to avoid touching the soil to prevent any dirt from contaminating your harvest.
Continue this process, working in sections, until you’ve harvested all your microgreens. If you only need a small amount for a meal, you can certainly harvest just what you need and leave the rest for later. However, once microgreens are ready, they don’t continue to grow much, and their flavor can start to diminish, so it’s usually best to harvest them all at once.
Post-Harvest Handling
Once you’ve harvested your microgreens, they should be consumed as soon as possible for the best flavor and nutrient content. If you need to store them, make sure they are dry and place them gently in a plastic bag or an airtight container. Store them in the refrigerator, ideally in the crisper drawer. They should be consumed within a week for optimal freshness.
Remember, harvesting marks the end of one growth cycle and the beginning of another. After harvesting, you can start the process over again by planting a fresh batch of seeds. This way, you ensure a constant supply of these flavorful, nutrient-rich greens right in your own home. Enjoy the fruits of your labor and the unique taste sensation that microgreens bring to your dishes.
Harvesting and Beyond
Microgreens are ready to harvest when they have developed their first set of true leaves, typically around 10 days to two weeks after planting. Use a sharp knife or scissors to snip the microgreens just above the soil level.
Each planting will yield only one harvest, as the microgreens won’t regenerate new growth. However, you can easily plant another crop right after harvesting. The old roots can be left in place, as they are excellent sources of organic matter.
FAQs
- Is it worth growing your own microgreens? Yes, growing your own microgreens can be an economical and rewarding hobby, providing you with fresh, nutrient-dense greens.
- Can you eat microgreens raw? For maximum nutritional benefits, it’s best to consume microgreens raw.
- What is the difference between sprouts and microgreens? Though they may look alike, sprouts and microgreens differ in growth conditions and edible parts. Sprouts grow in water, require no light, and can be eaten in their entirety. Microgreens, on the other hand, require light and soil, and only their leaves are edible.
- What happens if you don’t cut microgreens? Due to the dense planting of microgreens, they cannot mature into full-grown plants. If not harvested, they will eventually die from overcrowding.
Growing your own microgreens is a fun and fulfilling project that can yield tasty and healthful results. With this guide, you’re well on your way to harvesting your own fresh microgreens at home. Enjoy the process and the flavors you cultivate!