What Is Indoor Ivy?
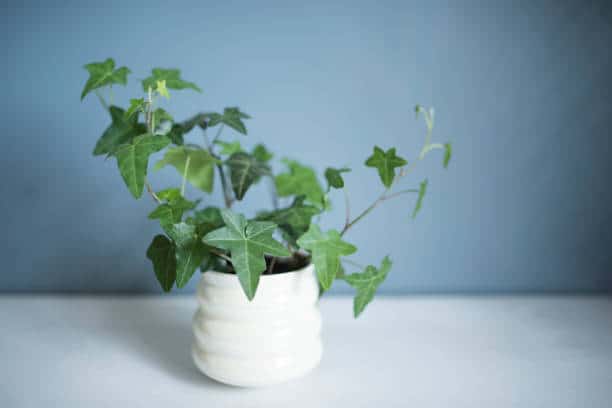
Indoor ivy is very similar to what you would find growing outside naturally in the wild. It’s an evergreen and an effective ground cover because it spreads quickly.
While many people think of ivy as a crawling vine, indoor varieties are actually low-growing evergreen plants that will generally only grow to about 12 inches tall. Although it’s tempting to think that ivy will continue growing as long as the leaves are touching a surface, this is not true.
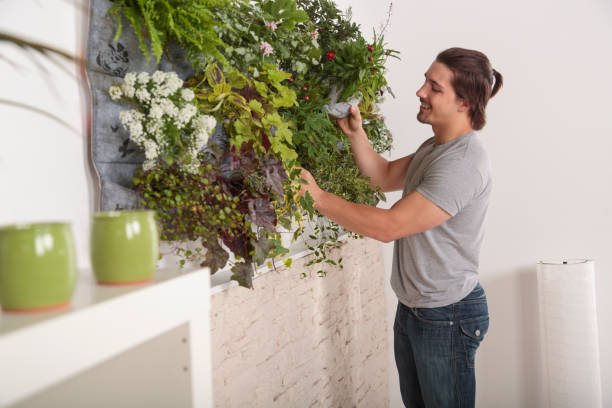
Ivy is designed to grow on trees and rocks outdoors where the leaves naturally touch an overhead support structure or another leaf. In an indoor environment, you must either train your ivy (see “Training” section below), provide vertical supports for it to climb, or allow one edge of the ivy leaves to rest on a wall or floor. In contrast, the other edge grows up toward vertical support structures.
Indoor ivy can be difficult for many people because they don’t want their plants crawling all over their house like a vine. It helps when selecting an indoor variety of ivy if you understand how it is designed to grow. The leaves form the “bottom” of the plant, and rootlets (stems) spread out along any surface they encounter, attaching themselves by using rootlike hairs that act a bit like Velcro.
Indoor Ivy Care & Maintenance Tips
While the ivy plant is inexpensive, it does require moderate care. This article will give you some basic information on properly caring for your indoor ivy to ensure its health and continued beauty.
Indoor ivy plants grown and cared for as described here should remain healthy and attractive for many years with minimal effort. The best way to make sure your indoor ivy continues to thrive is by following these easy steps:
1. Select the location where your indoor ivy will be located. Indoors, a window that gets plenty of bright light is best. Ivy does not like cold drafts and may die if kept in direct contact with them.
2) When You Get Your Indoor Ivy
a) Water your plant immediately upon arrival.
b ) Fill out this simple Ivy Tracking Sheet for tracking important information about your plant throughout its life cycle.
3) Remove brown leaves that have fallen from the plant. This is especially important if you use a belly band tied tightly around the trunk of your plant to support it as it grows (see “Training” section below).
Brown dead leaves sticking out from under the belly band can look quite unsightly. If you don’t remove them, they will continue to dry and eventually fall off.
4) Make sure your indoor ivy has proper light – Most people place their indoor plants near windows where they get natural daylight during the day. However, this may not be the best solution for several reasons:
a ) Window glass filters out too much UV light, which is necessary for many types of houseplants to remain healthy;
b ) Outside light often contains too much blue light, which can negatively impact the blooming of many flowering houseplants;
c ) Light levels and intensity change throughout the day as clouds pass in front of or away from the sun. The dappled (intermittent) sunlight found outdoors near windows is more difficult for some indoor plants than others to tolerate;
Light Requirements:
Indoor ivy plants do best when they can receive at least 6 – 8 hours of bright light each day. This is usually near windows facing north, where sunlight intensity is gradually reduced from east to west as the sun moves across the sky. Many people have had success using their indoor ivy in room corners that are dark or poorly lit by one or more windows.
The main requirement for these rooms is that you make sure your plant receives an adequate number of hours of bright but indirect light and that it never gets exposed to direct sunlight other than briefly when clouds pass by during dappled daylight hours.
Depending on your particular situation, you may also want to consider purchasing a 5-gallon grow-light hanger (
Water Requirements:
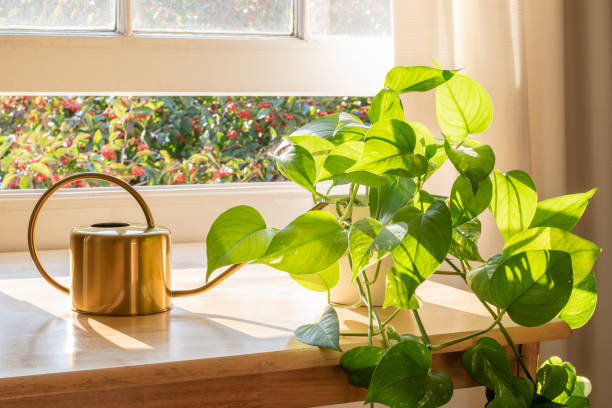
When watering your indoor ivy, be sure to drench the soil potting medium thoroughly. This encourages the roots to seek out more water as long as you are careful not to flood and wash away excess soil medium from around the base of the trunk.
Indoor plants sometimes get diseases if they receive too much or too little water. Keep in mind that overwatering can kill an ivy just as quickly and easily as underwatering. ***
Soil Requirements:
Ivy plants require soil with a good amount of organic material to thrive. Potting soils designed specifically for houseplants work very well and often contain added nutrients that consistently remain at optimal levels in the right conditions.
Indoor ivy grown in pots requiring special or long-term watering (e.g., those with self-watering systems) is also an an excellent candidate for these types of soils (these kinds of soils do not have any growing medium like gravel or clay beads, etc.).
If you decide to report your indoor ivy into a pot using one of these specialized soil products, be sure to provide adequate drainage holes so that excess water can quickly escape down into the drain pan underneath the soil surface.
If you currently use a different type of soil and are curious about which one to switch to, feel free to send us an email, and we’ll do our best to help you make this important decision.
Temperature and Humidity Requirements:
Ivy plants require warm, but not hot, temperatures. Outdoors can tolerate small amounts of light frost (brief exposure to temperatures down into the mid-20s F), but they will not grow well if exposed for more than short periods of time to temperatures much lower than this.
Because of their sensitivity to freezing weather and low humidity levels outdoors (they need plenty of water to stay healthy), ivy plants are typically grown as houseplants throughout most temperate regions. They should be kept at approximately 60-75 degrees Fahrenheit year-round with high relative humidity levels on average.
Fertilizing Requirements:
If you want your ivy plant to grow, you must fertilize it. However, if you are trying to encourage more compact and bushy (versus tall and leggy), then less fertilizer is best. If you are using any special potting soil, as mentioned above, the soil product will usually contain all of the nutrients needed for optimal health – so avoid overfertilizing. In most cases, indoor ivy plants prefer having their leaves sprayed with water rather than fertilized directly with a solution.
Potting and repotting Requirements:
Most ivy types prefer to have their soil mix kept on the dry side. So, when you are first repotting your plant, and it doesn’t seem to be drinking any water at all after getting a fresh drink of water – don’t fret! Let it sit for another few days before cutting back on watering to avoid accidentally causing root rot (yes, sometimes this happens) if you overwater too much.
Outdoor ivies typically require new pots every 2-3 years or so depending upon how quickly they grow (size is not always an indication – sometimes large vines will love being pot-bound and slowly will take over the inside of your house). Many indoor varieties can remain in the same pot without problems for many years.
If you want to repot your indoor ivy, generally speaking, they prefer “less is more” when it comes to soil depth and do not require a lot of extra room in the pot. First, look at how big and wide your plant’s leaves are getting if you still have them attached (for some types, this won’t be easy).
Cut the vine back on both sides just before a leaf node (where the tendrils attach) – don’t cut too far down, or else new vines will grow from below the first leaves that were cut off. You can trim away old vines as needed – keep in mind that some varieties may come back each year looking very different than they did during previous years (this is usually due to a change in potting soil or amount of light received).
When watering, tap the base of the planted ivy with your finger to help push extra water down into the soil. Ivy plants generally prefer being watered at their base rather than from the top – this improves drainage and helps prevent rot from occurring on older leaves and vines that have fallen off nearby.
If you want to encourage your ivy plant to grow larger trunks, place it in a sunny location where it does not receive direct sun for more than 10-12 hours per day (if possible) and give it plenty of room. If you are potted outside during summer, be sure to protect yourself from temperatures above 100 degrees F and provide the plant with plenty of water during dry periods.
If you want to encourage your ivy to grow more vines, keep it potted in a cool area near a window that gets only indirect sunlight for 10-12 hours per day, and be sure to keep it well watered (and help prevent critters from getting at it by using screen covers).
If your vine is growing too tall indoors for its location, trim away old leaves and vines as needed – but take care not to cut back on new growth, or else this could stunt overall vine length. Some indoor vines can reach lengths of 50 feet or more when given enough space over time!
Indoor Ivy Propagation info:
There are several methods to propagate your indoor ivy plants:
1) Cuttings. Depending upon the type of plant you have, you can try taking cuttings from a new growth tip (newly formed leaves at the end of vines). In most cases, this usually works best in spring or early summer when vines are still young and very green (many types will brown over time if left alone).
For best results, place the cutting inside a pot that contains wet peat moss (or soil that is like peat moss) for 2-3 weeks before placing it into another pot with more soil (do not use fertilizers in potting soil until vine has had time to adjust to a new environment).
If you have a rooted cutting, you can place it into soil as-is (do not repot) and watch for roots to develop within a month or so. Ensure your indoor ivy gets plenty of light after rooting has occurred – if no new vines appear within a few weeks, trim off the top few inches of the plant to encourage new growth (many are slow in growing their first vine at first).
2) Air layering: Many types of indoor ivy can be air layered using a special 3-prong cutter or a very sharp knife. To do this, gently remove all leaves from the base of where you want to attach your future air layer (for some plants, you may need to remove an entire branch rather than just a single vine).
Next, remove about 1/2″ of bark from the plant’s stem – if you are using a knife, be very careful not to cut into any part of the actual vines themselves. Gently cover the base area with wet sphagnum moss (or some other type of roofing material that will allow extra water to drain away slowly) and wrap plastic around this area to keep it all moist until new roots begin growing in 2-4 weeks.
Once new vines start appearing within your air layer, continue wrapping the entire thing in plastic and wait for more leaves to appear along your trunk before removing it from its current container with soil.
Be sure that your ivy gets plenty of light after such removal so that you can see where new vines start forming. If you want to root your air layer fully, continue moving it into a larger pot over the next few months so that it does not dry out from being in direct sunlight during summer (the more roots that form, the better).
3) Leaf Cuttings: Many types of ivy have leaves that grow back year after year – so by taking a leaf-cutting (or two), you can treat this like it is another vine plant and slowly start to develop your own little “bush” or cluster of indoor ivy plants. To do this, use a sharp knife to carefully cut away an entire leaf along with 1/4″-1/2″ off of its base.
Place the flat side down onto a damp paper towel for a few weeks until roots start forming – then transfer your leaf cuttings to soil and keep inside of the container so that new vines can develop.
4) Don’t forget the seeds: Did you know indoor ivy plants often produce small flowers when given enough light? To get an easy start on more indoor ivy plants, let some of these flowers dry out before collecting seeds that will form in their dried fruit (these usually take about 2-3 weeks to appear).
You can store these in a cool dark area for up to 6 months before using them – sprinkle seeds over the top of soil within containers and keep them moist until they have grown into vines. Note: because most types of indoor ivy
Indoor Ivy Problems
When growing indoor ivy, several common problems plague these types of plants – these include:
1) Poor light conditions: If you keep your indoor ivy in the darkroom with no windows or lighting, be aware that this can cause poor growth and leaves that turn brown (usually along the edges).
When placed into bright light, many types of vines will die back and recover very quickly – so if changing lighting makes them look sickly for a few days, don’t worry. This type of plant often needs extra light to grow properly (many varieties do not need direct sunlight).
2) Too much water: Just like most other plants do, indoor ivy responds well to plenty of water – but too much can kill it in a few days. Learn to wait until you see new leaves growing if you are using tap water for your ivy’s dirt (some types of indoor ivy have smaller roots than others and thus require more time to grow them).
3) Too much fertilizer: Just like with plants in the ground, indoor varieties tend to grow faster when given fertilizers – but too much can cause leaf burn (brown dead spots on leaves) or bigger problems such as insects that eat away at vine growth.
4) Pests: While most bugs don’t bother plants inside of your home, spider mites love eating away at the edges of leaves and small vines. This problem appears as specks on leaves that look like tiny white dots (when you see them, it is already too late for the plant).
If you have enough light and your ivy plant stays extremely healthy-looking, this problem rarely appears – but if not taken care of quickly, spider mites can leave your indoor ivy plants in sad condition.
5) Failed air layers: If an air layer fails due to drying out or dying back (this usually happens during winter), wait a few weeks before trying another one on a new section of growth.
When first starting to root cuttings via air layering, try cutting several leaves and then doing this same process on each leaf over the next month or two – when some grow vines from both ends, you will know that it is safe to take your indoor ivy plant out of the pot. (Note: If only one end grows vines after several weeks, throw this leaf-cutting away and continue the process on a new section of growth).
6) Too much sunlight: Many types of indoor ivy can be given bright direct light, but if you notice yellowing leaves (especially between veins), this means it has been exposed to too much sun for an extended period of time.
This will cause unsightly brown spots on leaves and eventually kill off vine growth – so keep your indoor ivy in a shaded area or gradually introduce it into more sunlight over a long period.
7) Not enough sunlight: On the other hand, if you give your indoor ivy too little light, it will usually grow tall vines and small leaves – leading to a weak plant that eventually dies.
This problem is often easy to identify since most types of indoor ivy have long thin leaves that are seldom green in color (another sign that it needs more light). If this happens, try moving your plants closer to windows or adding additional artificial lighting for them.
8) Problems with repotting: When first starting with air layering, you may notice problems with certain types of indoor ivy when trying to take them completely out of dirt over time.
When attempting this process for the first time (especially on older outdoor varieties), you may end up with a vine that kills off and turns brown after a few months of air layering.
This problem is often recognizable when the bottom of the vine (where you cut away from dirt) turns brown first – it usually happens if your indoor ivy is placed in water that has not had time to dry before being repotted.
If this happens, leave your plant alone for a week or two and then start over by letting it sit outside for a while so its roots can regain strength (you should also try taking out only part of the soil around an area instead of the whole pot).
9) Poor lighting: With most types of indoor ivy, you will notice problems with their growth and health if they are kept in dim lighting for extended periods. Just as too little sunlight can cause them to grow long and thin with small leaves, too little artificial lighting can also cause the same problem.
In this situation, you will see vines that start out growing upwards but then die back or shrink in length over a few weeks (leaves will also tend to be smaller and not as green compared to healthy indoor ivy plants).
If your plant has this problem, move it closer to artificial lights for best results (make sure they are on for around 12 hours a day).
10) Adding fertilizer at the wrong time: When first starting with your new air layered indoor ivy, do not attempt adding any fertilizer right away since it could burn off new growths.